Cookie preferences
Dying hair, either for a change of look or to cover grey hair, is something that most women and some men do at some point in our lives, it’s a beauty ritual or slavery, depending on how you see it ;) But not all of us have the time, the desire or the money to do it regularly at the hairdresser’s, and now that we are so often stuck at home, we need a little skill if we want to keep our hair dyed and looking good. The market offers a multitude of solutions that are increasingly easy to use, with ingredients that, in addition to dyeing hair, keep it shiny and in good condition.
If you are a 'newbie' in the art of hair dyeing, don't panic! Here are some simple tips so you can do it in the comfort of your own home, with your own hands, without rushing. Think of the positives: you will save money, and if things do not go as well as you expected, you can always try again in a few days...
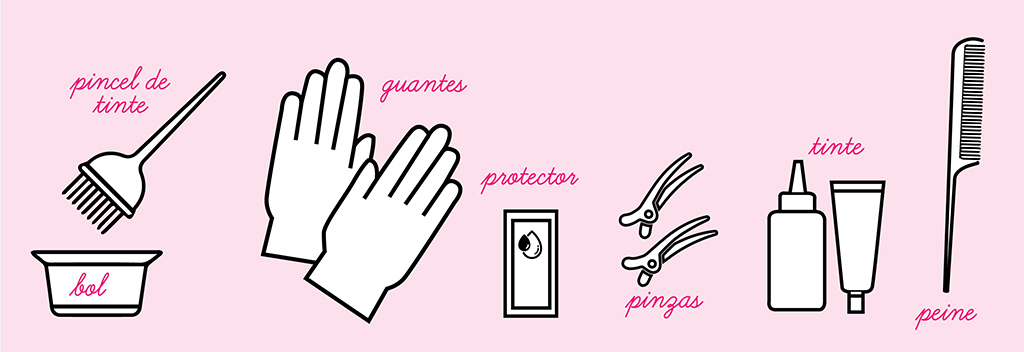
What do you need?
• Bowl to mix the dye
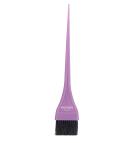
• Dye brush
• Latex gloves and cape/towel to cover your clothes
• Protective product for the skin around the face, Vaseline or almond oil, for example
• Hair clips (not metal)
• Long fine-handled comb (not metal)
• Dye
Choosing a dye
The first thing is to choose the product. There are natural ones, like henna, and permanent or semi-permanent ones (with or without ammonia).
Semi-permanent ones wash out and last about 4 weeks, while permanent ones don't wash out, but you do need to touch up the roots as your hair grows
As for the shade, if you like to maintain a natural appearance, it is better that you opt for a colour that is closest to yours. If you have a lot of grey hair, the result after dyeing may be a little lighter than you expected, so keep that in mind when choosing a colour. The same happens if your hair has been coloured previously and you apply a very different shade on top.
Once you have chosen the dye, it is important to read the instructions well and follow them. If you haven't tried it before, do an allergy test. And if everything is alright, prepare all the products for the process and let’s get started!
Step by step
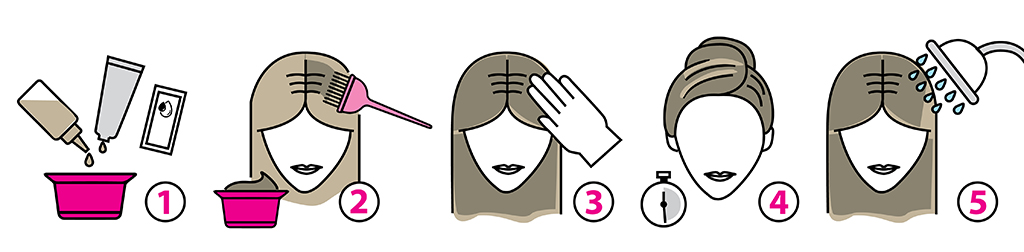
1.- Mix as directed by the manufacturer's instructions. Before starting, protect the sides of the face, ears and neck with a little almond oil, cream or Vaseline to avoid staining the skin. The dyeing process must always be carried out on dry hair. It is better that it is not freshly washed. According to experts, clean hair is more sensitive to possible irritations.
2.- With the help of the comb, divide your hair in half, parting it in the middle and start dyeing it right in this area, applying the product with the help of a brush, distributing it well. Make a new part in your hair parallel to the one you just dyed with the help of the comb (at 1 cm or 1.5 cm) and repeat the action. Repeat the same process until you finish with all the areas you are interested in covering.
It is important to always take small amounts of product and separate sections by selecting fine strands of hair with the help of the comb.
3.- If you are a regular at hairdresser’s, a touch up of the roots will be enough, you can leave complete dyeing for your next appointment. If you want to dye all your hair, once you have applied the product to the roots, you can spread it with your own hands on the strands as a massage so that it is well distributed. Also take into account the condition of your hair, if it is damaged, it is more porous, so it will absorb more colour.
4.- Once you have applied the product, put your hair up and let it act for the time indicated by the manufacturer (usually around half an hour).
5.- Finally, rinse with plenty of warm water, it is possible that the dye used already includes a serum, mask or conditioner to help close the cuticle, which makes the hair shinier and softer and the dye last longer. After rinsing, it is time to apply these products. Some manufacturers indicate that it is not necessary to wash the hair after this process, since the product itself leaves it clean. So, all you have to do is dry it and enjoy the new look.
So, shall we add a little colour to life?