Well-cared-for hands, beautiful hands
If the face is the mirror of the soul, then hands reveal many details about the way we are and our image. That is why it is important to always keep hands and nails cared for, looking healthy, beautiful. With a good manicure kit and a little time, it's easy to achieve!And besides that,enjoying a few minutes of tranquillity and pampering is worth it.
Step 1 Shaping: cutting and filing
Whatever style you choose, be careful to cut following the natural shape of your nails. And you should never pass the free edge of the nails. This willprevent ingrowing nails in the future.
If you are wearing nail polish, remove it with a cotton swab soaked in nail polish remover.You will find itvery convenient to use the Nail Care wipes, which also moisturise and protect your nails.
Depending on the thickness and length of your nails you can cut them before filing them. Use scissors, nail clippers or nippers.
If you use thescissors, cut straight and in just one movement. The nail clipper is easier to use if you do not have a lot of practice.
Filing correctly prevents breakage and flaking of the nails, it helps them to grow healthier and stronger. An important tip is to always file in the same direction.
For shortening, the fibreglass file or the sapphire file are the most suitable. If you opt for the fibreglass file,look at the grit number.
- Between 120 and 180 the grit is thicker, suitable for shortening or for the initial filing.
- From 220 to 240 it is composed of many very small grains, ideal for shaping edges with smoother filing.
To finish defining the shape, whether round or square, we recommend the tempered glass file prevents the chipping and are very strong and durable.
Step 2 Remove cuticles
This step is one of the most important ones, where you can treat cuticles efficiently, delicately and provide extra hydration. Your nails will be clear and wider.
Remove the filing dust with the aid of a brush and a little water, gently go over the top and bottom part of the nails to remove any impurities.
Apply the cuticle remover Cuticle Softener and let it act for a minute, helping to soften your cuticles and remove them more easily. Furthermore, thanks to its formula based on Glycerine, D-panthenol, Allantoin and Almond oil, it provides maximum hydration.
Push the cuticles backgently with the orange wood stick. Your nails will look morestylized.
Step 3 Remove cuticles and give shine
It is not advisable to cut the cuticle completely; its fine skin surrounds the base of the nails and protects its matrix. If you prefer not to apply colour, you can finish your manicure at this stage and boast a natural shine with the help of the buffer.
To achieve a more polished result you can finish eliminating the dead skin or snags with the nippers, cuticle cutters or cuticle scissors. If you use the cuticle cutter, start from the centre with short, gentle movements, without exerting force. Tip: To cut small pieces of skin or snags correctly use the tip of the nippers, not the central area.
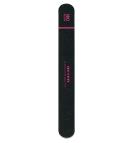
The nail buffer provides light exfoliation on the surface of the nails with a surprising result: smooth, soft and with natural brightness without need for applying polish.
First with the Step 1 side you eliminate roughness and smoothen. Pass over the surface sparingly and without applying much force. It should be done every two weeks or every three weeks if the nails are very thin or weak.
With the Step 2 side rub six times and you will see extraordinary shine. Once a week is enough for the nails to have an excellent finish.
Environmental factors, contact with chemicals or the passing of time can leave your nails dull and your cuticles dry. To nourish them and to keep them soft and supple, use Treasure Oil almond oil daily. Its high concentration in pure almond oil moisturises and restores nails and cuticles acting on the nail matrix.
Step 5: Apply colour
It is important to choose cosmetics that protect your nails from external agents. That way the final touch will beautify your nails while taking care of them at the same time.
For a uniform and longer-lasting result, apply the Ridge Vanisher smoothing base for fluted or rough nails.Itshigh concentration of minerals fills the ridges and small imperfections and unifies the surface instantly.
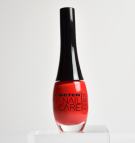
Now it is time to add some colour. Choose one of the Youth Color rejuvenating shades: apply a thin first layer and, once dry, apply another one the same. With its panoramic brush it will be very easy.
With Youth Color polishes it is not necessary to use a base before the colour, when applied directly on the nails;its anti-aging ingredients penetrate and take effect. If you use conventional polishes, it is essential to use a base to protect your nails. Tip: Remember to paint the edge of the nails, this will seal the polish and lengthen the length of your manicure.
Finish with the Plumping Top Coat, which seals and protects the colour with an extraordinary gel effect finish. Your nails will be shiny and the polish will gain volume making your manicure prettier.
Finally, an Express Dry coat will dry your nailsin seconds. So, you will not have to wait for them to dry on theirown. Now youcan enjoy your manicure!
Pedicure at home
Secrets to have the world at your feet
Walking, running, jumping, going up and down, dancing... feet bear weight all day long and at the same time is one of the parts of our body thatreceives the least attention. The ritual of the pedicure reconciles uswith them and brings us a moment of relaxation. Standing strong with healthy, sensual and soft feet is as simple as reserving a little time for yourself and enjoying your pedicure at home with good tools.
Step 1
Soft feet
Calluses, a thickening of the skin caused by the pressure or friction of footwear, usually appear on heels, toes or on the sole of the foot. You can choose the most suitable tool to remove them according to the thickness: light, medium or severe calluses.
Soak your feet in a bowl of lukewarm water for about five minutes to help soften the hard skin and cuticles. Clean the nails with a brush and if you are wearing polish, remove it with an Express wipe.
If you have severe hard skin, use the Beter corn plane which, thanks to its exclusive regulating head of the thickness of the cut, eliminates them in a safe and comfortable way.
Buff the heels and areas where the skin is drier, removing the dead skin with the help of a pumice stone or a pedicure file. To keep the skin smoother and moisturised, give your feet a gentle massage with the Anticallus cream: they will be grateful.
Step 2
Cut and shape
The toenails are thicker and grow at a much slower pace than those of the hands, so always use special pedicure cutting tools.
Use scissors, nail clippers or nippers, you choose.It is advisable to cut the nails straight and not too close to the edges to avoid them sticking in the skin. If your nailsare very thick use pedicure scissors with short blades, its special design allows you to cut them more effectively. Tip: For ingrowing nails or nails tending to grow inwards, the special nippers with a straight cutting angle is the appropriate one to cut with precision and safety.
Shape them with a fibreglass file on the coarser grain side to shorten and use the thinner side to finish profiling them.File with a straight shape without over-filing the sides and always in the same direction. Remove the filing dust with the aid of a brush and a little water;givesmall strokeson the top and bottom of the nails to removeany impurities
Step 3 Remove cuticles
Keeping the cuticles hydrated is the key to healthy looking nails. Remember, it is not advisable to remove the cuticles completely because their thin skin protects the nail matrix.
Moisturise your cuticles with Cuticle Softener by Beter Nail Care, leaving it on for one minute will make it easier to clear your nails. Tip: Another quicker solution is the Manicure Express Remover Pen: Apply it, let it act for a minute and remove the cuticles with the bevelled tip of the pen.
Use an orange wood stick or tempered glass stick to gently push the skin around the contour of each nail. If necessary, remove excess skin or hangnails with the nippers or scissors.
Step 4 Finish
Painting your toenails, especially if you are wearing open-toe shoes, completes your outfit with a well-cared-for look. Why not? Its fun!
If your nails are grooved or rough, apply a Ridge Vanisher smoothing base coat and you will get a uniform surface instantly. Tip: If you do not want to paint your nails, you will get a shiny finish with the professional buffer.
Choose your favourite Youth Color rejuvenating nail polish and use the finger separator to make it easier to apply. For a professional finish, apply a coat of Plumping Top Coat gel effect, which lengthens the duration of the polish, gives it shine and volume. Forget waiting for your nails to dry: a layer of Express Dry and they are ready instantly.


 ACCESS
 Cookie preferences
